Blog

  • How to use fliki for ai realistic voice over (6 Simple Steps)

    How to use fliki for ai realistic voice over (6 Simple Steps)

    Fliki is a powerful tool for creating artificial intelligence (AI) voiceovers that sound realistic and engaging. With its advanced text-to-speech technology, Fliki can generate high-quality voiceovers in a variety of languages and accents. In this article, we will explore How to use fliki for ai realistic voice over for your videos, podcasts, and other audio content.

    How to use fliki for ai realistic voice over

    Step 1: Sign up for a Fliki account

    How to use fliki for ai realistic voice over? To start using Fliki, the first thing you need to do is sign up for an account. You can do this by visiting the Fliki website and clicking on the “Sign Up” button. You will need to provide your name, email address, and password to create your account. Once you have signed up, you will be redirected to the Fliki dashboard, where you can start creating your voiceovers.

    Step 2: Choose a voice and language

    Fliki offers a wide range of voices to choose from, including both male and female voices in different accents and languages. To select a voice, simply click on the “Voices” tab in the dashboard and browse through the available options. You can preview each voice by clicking on the “Play” button next to it.

    Once you have selected a voice, you can choose the language in which you want your voiceover to be spoken. Fliki supports a variety of languages, including English, Spanish, French, German, Italian, and more. Simply select the language from the drop-down menu in the dashboard.

    Step 3: Enter your text

    Now that you have selected a voice and language, it’s time to enter the text for your voiceover. You can do this by clicking on the “Text” tab in the dashboard and typing in your script. Fliki has a character limit of 1000 words, so if your script is longer than this, you will need to split it into multiple voiceovers.

    Step 4: Adjust the settings

    Fliki offers a range of settings that you can adjust to fine-tune your voiceover. You can find these settings in the “Settings” tab in the dashboard.

    One of the most important settings is the “Pitch” setting, which allows you to adjust the pitch of the voiceover. You can use this setting to create a deeper or higher-pitched voice, depending on your needs.

    Another important setting is the “Speed” setting, which allows you to adjust the speed at which the voiceover is spoken. You can use this setting to make the voiceover sound faster or slower, depending on your preference.

    There are also a range of other settings that you can adjust, such as the “Volume” and “Enunciation” settings. Experiment with these settings to find the perfect balance for your voiceover.

    Step 5: Generate the voiceover

    Once you have entered your text and adjusted the settings to your liking, it’s time to generate your voiceover. To do this, simply click on the “Generate” button in the dashboard. Fliki will then process your voiceover and generate an audio file that you can download and use in your videos or podcasts.

    Step 6: Download and use your voiceover

    To download your voiceover, click on the “Download” button in the dashboard. This will download the audio file to your computer, which you can then use in your videos or podcasts.

    If you want to use your voiceover on a video, you can do this by importing the audio file into your video editing software and placing it over your video. If you want to use your voiceover on a podcast, you can do this by uploading the audio file.

    Conclusion

    In conclusion, Fliki is a powerful tool for creating realistic AI voiceovers for your videos, podcasts, and other audio content. With its advanced text-to-speech technology and wide range of voices and languages, Fliki makes it easy to create high-quality voiceovers that sound natural and engaging. By following the steps outlined in this article, you can easily create your own voiceovers using Fliki, and use them to enhance your audio content and bring your message to life. Whether you are creating a video, podcast, or another type of audio content, Fliki is an invaluable tool that can help you take your audio to the next level.
  • How to use Dynamic Island in Windows?

    How to use Dynamic Island in Windows?

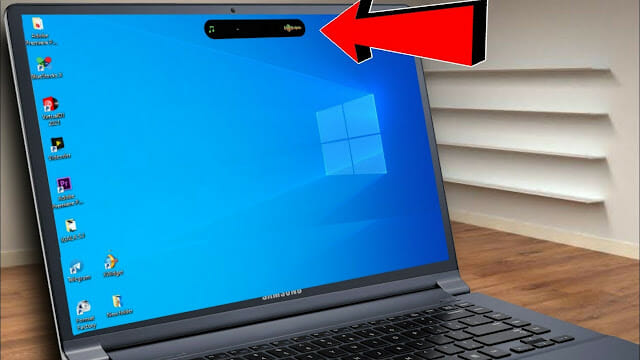
    How to use dynamic island in windows because one of my favorite features of the iPhone 14 is the new Dynamic Island and now this dynamic island features you can use in windows. The Dynamic Island will expand and contract (and in some cases, bubble out) to show important cautions, ads, or alerts. It’s a cool addition and now you can add this point on Windows too. In this article, I’m sharing with you the full method of How you can use Dynamic Island feature in Windows. So, read the full article and If you have any query So, tell us in the comments.

    What is Windows Dynamic Island?

    Windows Dynamic Island is a new feature in Windows that allows you to create a virtual space on your PC where you can store and run apps. This space is separate from your main operating system and is only accessible when you’re connected to the internet.
    The advantage of this feature is that it gives you more control over the apps you use and how they interact with your PC. You can also use it to test new apps or features without affecting your main system.
    To set up Windows Dynamic Island, you’ll need to install the Windows Creators Update. Once you’ve done that, open the Settings app and go to the “System” section. Click on “Dynamic Island” and then follow the instructions on the screen.

    How you can use Windows Dynamic Island?

    In Windows, you can use Dynamic Island to create an island that changes shape and size. To do this, you first need to create a new island. To do this, go to the “Start” menu and select “All Programs.” Next, click on ” Accessories” and then “Dynamic Island.” Once the program has been launched, click on the “Create New Island” button.
    Now that you have created a new island, you need to specify its size and shape. To do this, click on the “Size” tab and enter the desired width and height for your island. Next, click on the “Shape” tab and select the desired shape for your island. Once you have specified the size and shape of your island, click on the “OK” button.
    Your new island will now appear in the center of your screen. To move it around, simply click on it and drag it to the desired location. You can also resize your island by clicking on one of its corners and dragging it outward or inward. To delete an island, right-click on it and select “Delete.”

    The benefits of Dynamic Islands

    One of the benefits of Dynamic Islands is that it helps to keep your Windows computer organized. It does this by creating shortcuts on your desktop for frequently used programs. Additionally, Dynamic Islands can help you save time by allowing you to launch programs with a single click.
    Another benefit of using Dynamic Islands is that it can improve your productivity. By keeping frequently used programs within easy reach, you can avoid wasting time searching for them in your Start menu or taskbar. Additionally, the ability to launch programs with a single click can help you get work done more quickly.
    Overall, Dynamic Islands can help you save time and be more productive. If you are looking for a way to organize your Windows desktop, consider using this program.

    Download Dynamic Island Below

    Steps to Download Dynamic Island In Windows:

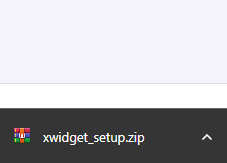
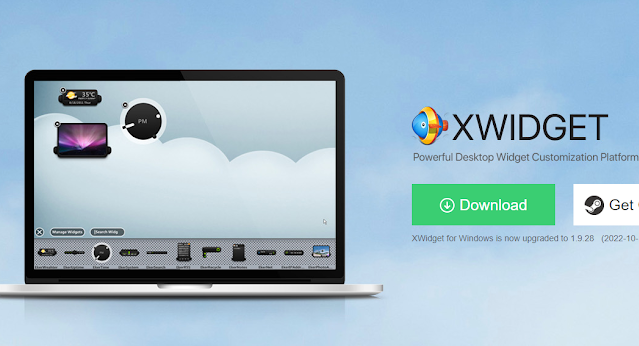
    1. To get started, first download XWidget. Then extract and install the software on your device.

    2. Next, download the Dynamic Island Widget on Windows.

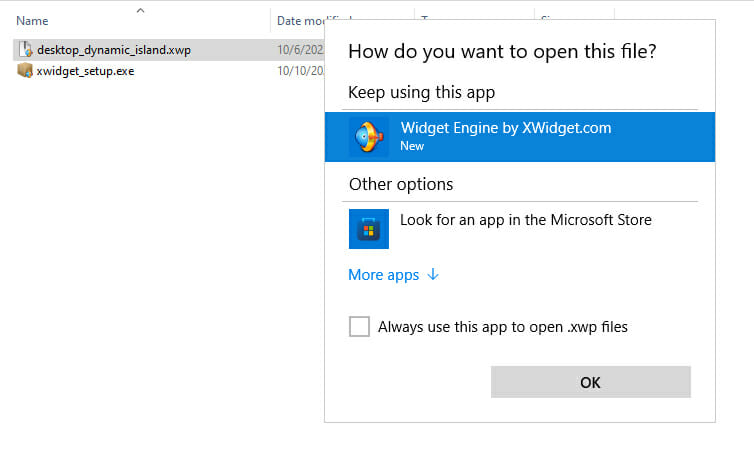
    3. The Next Step you’ll need to do is to left-click the Widget Dynamic Island Application and select “Open with > Widget Engine by X Widget .com”

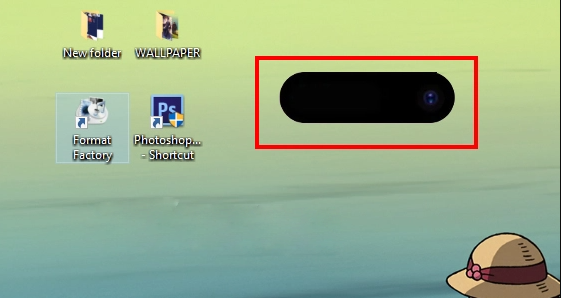
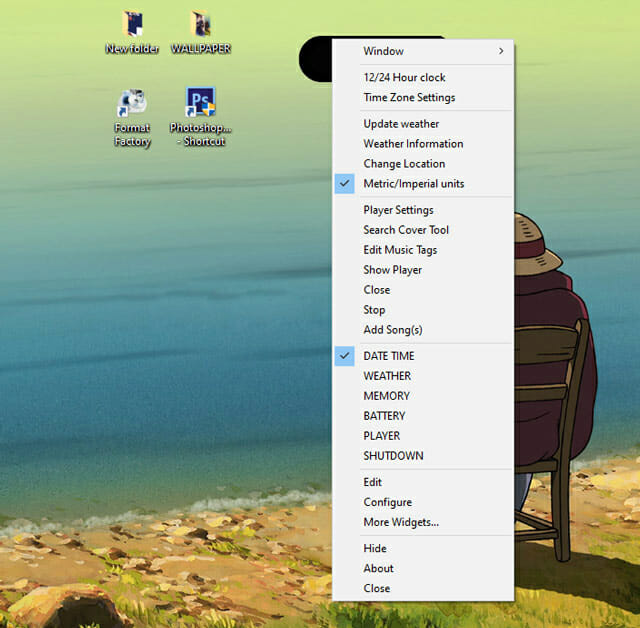
    4. Through the stated steps, Dynamic Island will automatically create an icon bar for your desktop. You can left-click to expand the display content of this bar such as a calendar, clock, and music player.

    5. Furthermore, You can easily customize your Dynamic Island to either show all items or only the specific ones that you want.

    Conclusion

    We hope this article on dynamic islands in Windows has been helpful and you can fully understand how to use dynamic island in windows properly, As you can see, dynamic islands offer several advantages and can be a great way to improve your workflow. If you’re looking for a more efficient way to work with windows, we highly recommend giving dynamic islands a try.

  • How many watts to charge a laptop (Best Guide)

    How many watts to charge a laptop (Best Guide)

    Do you know How many watts to charge a laptop? If you’re like most people, you probably don’t. And that’s perfectly understandable. After all, there’s a lot of techs out there and it can be tough to keep track of it all. But if you’re curious about such things or if you’re looking to save some money on your power bill, then read on. In this article, we’ll discuss how many watts it takes to charge a laptop and some tips for reducing your laptop’s power consumption.

    What are watts?

    When it comes to laptops, one of the most important questions is how many watts you need to charge the device. After all, if you’re working on your laptop while it’s plugged into the wall, you want to make sure that you’re getting the most efficient use of your power outlet. So, how many watts does it take to charge a laptop? The answer may surprise you. While there are a variety of factors that can affect how much power your laptop needs to charge – including the specific model of laptop and the type of charger you’re using – the average is between 60 and 90 watts. That means that if you’re using a standard home outlet, you should be able to charge your laptop without any problems. However, if you’re using a public charger or an older charger, it’s possible that your laptop may not be getting enough power to charge properly. In these cases, it’s always best to err on the side of caution and plug your laptop into a higher-wattage outlet (such as a 120-volt outlet) to ensure that it charges quickly and efficiently.

    How to calculate wattage (formula)

    How many watts to charge a laptop? The formula is quite simple:
    Take the voltage of the laptop (usually written on the back or bottom of the device near where you plug in the power cord) and multiply it by the amperage. This will give you the wattage that your laptop charger uses. For example, if your laptop has a voltage of 19.5 and an amperage of 3.25, then you would multiply those two numbers together to get 62.875 watts. That’s how many watts your laptop charger uses. Keep in mind that most laptop chargers also have a “safety factor” built in, so they may actually use slightly more than 62.875 watts when plugged into an outlet. However, for the purposes of this
    the calculation, 62.875 watts is close enough.

    How many watts do to charge a laptop

    Plugging in your laptop to charge it is a pretty simple process. But have you ever wondered how many watts it take to charge a laptop?
    The answer may surprise you. It turns out that the wattage required to charge a laptop varies depending on the model of the laptop and the charger that you are using. For example, a typical laptop charger uses 45 watts of power. However, some high-end laptops require more than twice that amount of power to charge. So, how can you determine how many watts your particular laptop needs to charge? The best way is to consult your laptop’s manual or the manufacturer’s website. They will have specific information on the wattage required for your model. Once you know how many watts your laptop needs to charge, you can use that information to select the proper charger. Make sure that the charger you choose can provide enough power for your laptop. Otherwise, you may not be able to fully charge your device.

    Conclusion

    The wattage needed to charge a laptop will depend on the make and model of the laptop, as well as the battery size. Generally speaking, you’ll need between 60 and 120 watts to charge a laptop. However, it’s always best to consult your laptop’s manual or manufacturer’s website to get the specific wattage required for your make and model. With that said, there are a few things you can do to maximize efficiency when charging your laptop. Be sure to use the correct power adapter for your laptop, as using one with too high or low of wattage can damage your battery. Additionally, try not to use your laptop while it’s plugged in and charging, as this can also reduce battery life over time.